🔁 Call Forwarding Modes
Part of the UsVox System Administration Web Interface Manual and
Created by the UsVox Support Team
📌 Overview
UsVox offers three flexible forwarding modes in your IP Centrex settings:
1️⃣ Follow-Me Forwarding — Forward calls to multiple numbers in a sequence.
2️⃣ Advanced Forwarding — Includes Follow-Me plus SIP URI routing and caller ID controls.
3️⃣ Simple Forwarding — Forward all calls to a single number.
✅ 1. Follow-Me Forwarding
Follow-Me lets you forward incoming calls to multiple destinations, each with its own ring time and active time period.
🚦 How to Set Up Follow-Me
-
Go to IP Centrex > Call Forwarding.
Click the ➕ Add New Number button.

- Fill in:
-
Number — Enter the destination number (e.g. your cell phone).
Description — Short label for this number.
Ring for — How many seconds to ring before trying the next number.
Use this number —
- Check Always to make it active 24/7.
- Or check Only at the following time interval to set a custom schedule.
- Click the Time Period icon to open the Time Period Wizard.
-

- Click the 💾 Save icon to save.
- Repeat steps 2–4 to add more destinations.
⏰ Time Period Wizard
Use the Period Wizard to define when each number is active:

Example:
- Forward to cell phone from 8 PM to 8 AM, Monday–Friday
Steps:
-
On the wizard’s first page, set From = 20:00 and Until = 08:00 → Click Next.
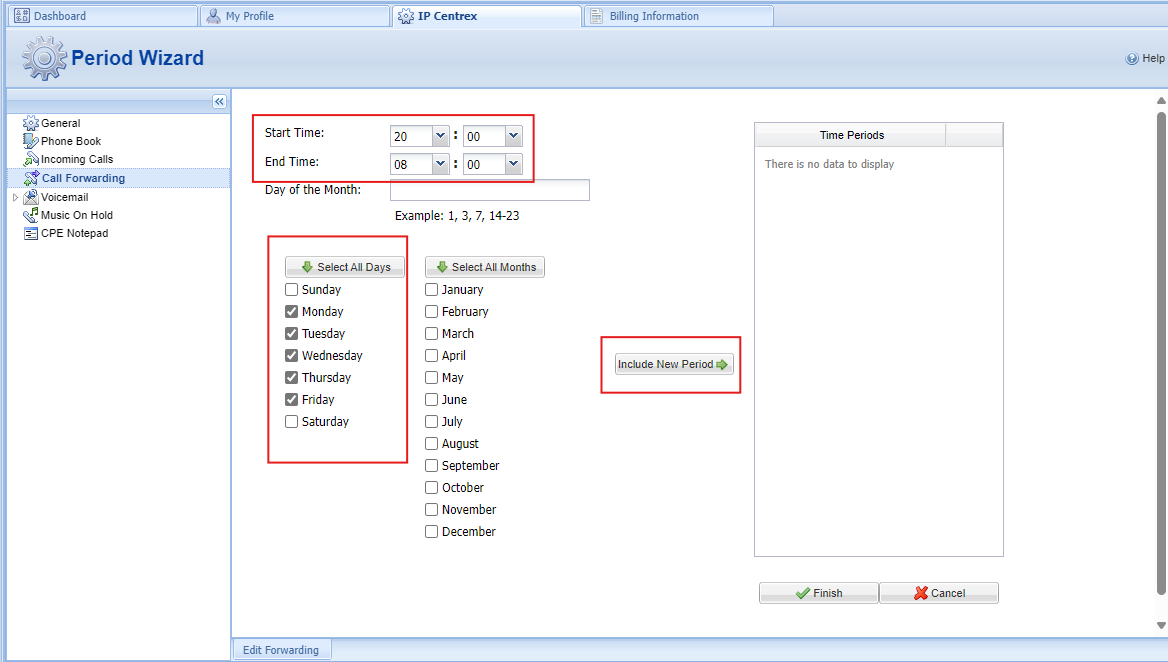
- Check mark Days you like to select
- Click Skip for Day of Month.
- Click Skip for Month.
- Click Include New Period
-
Click Finish — or Add another definition if needed.
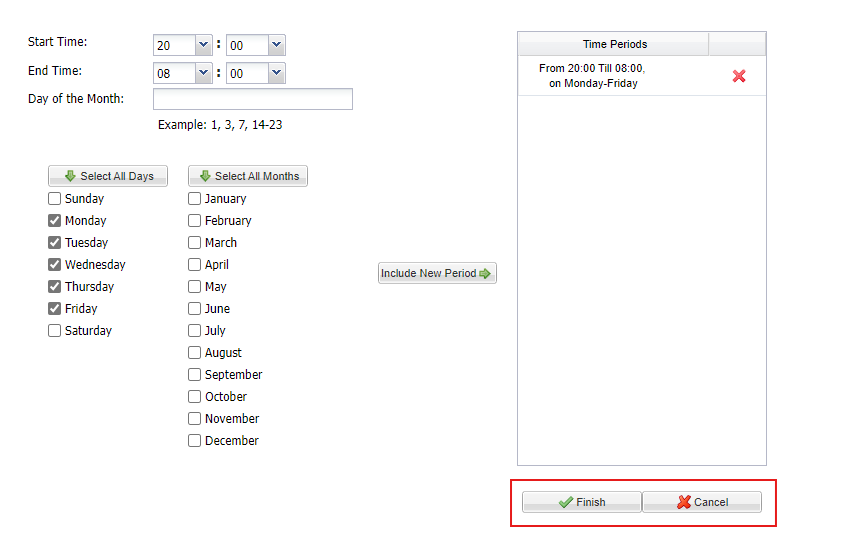


✅ Tip: For always-on, click the Always button in the wizard.
✅ 2. Advanced Forwarding
(Must be activated by UsVox Support)
Advanced Forwarding builds on Follow-Me and adds SIP URI routing plus extra caller ID and protocol options.

Steps:
-
Go to IP Centrex > Call Forwarding > Advanced Forwarding.
Click Add New Number.
Fill in the standard fields (Number, Description, Ring for, Time Period).
Additional fields:
-
Show Advanced Settings — Select from the dropdown.
Keep Original CLD — Keeps the originally dialed number in call data.
Calling Party Display — Choose how to show caller info:
- Caller Number and Name
- Caller Number and Forwarder Name
- Forwarder Number and Name
- Ring for — Choose UDP or TCP bathe amonth of time (SEC) to forward the call to destination.
- Ring Schedule:
- Always
-
Only at the following time interval (Period Wizard)
-
- Click the 💾 Save icon.
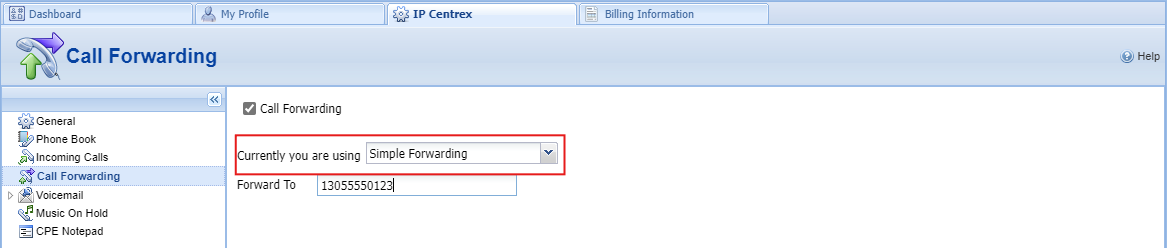
✅ 3. Simple Forwarding
(Must be activated by UsVox Support)
The simplest type — send all calls to a single number.
Steps:
-
Go to IP Centrex > Call Forwarding > Simple Forwarding.
Enter:
-
Forward To — the destination number.
-
- Click the 💾 Save icon.

📝 Need Help?
For assistance setting up or activating any forwarding mode, contact UsVox Support:
📧 support@usvox.com
📞 1.855.MyUsVox (698-7869)
📱 Call Support at 1786-275-5888
HABLAMOS ESPAÑOL
✅ Next: Explore related topics like Hunt Groups, IVRs, and Queues for advanced call routing.